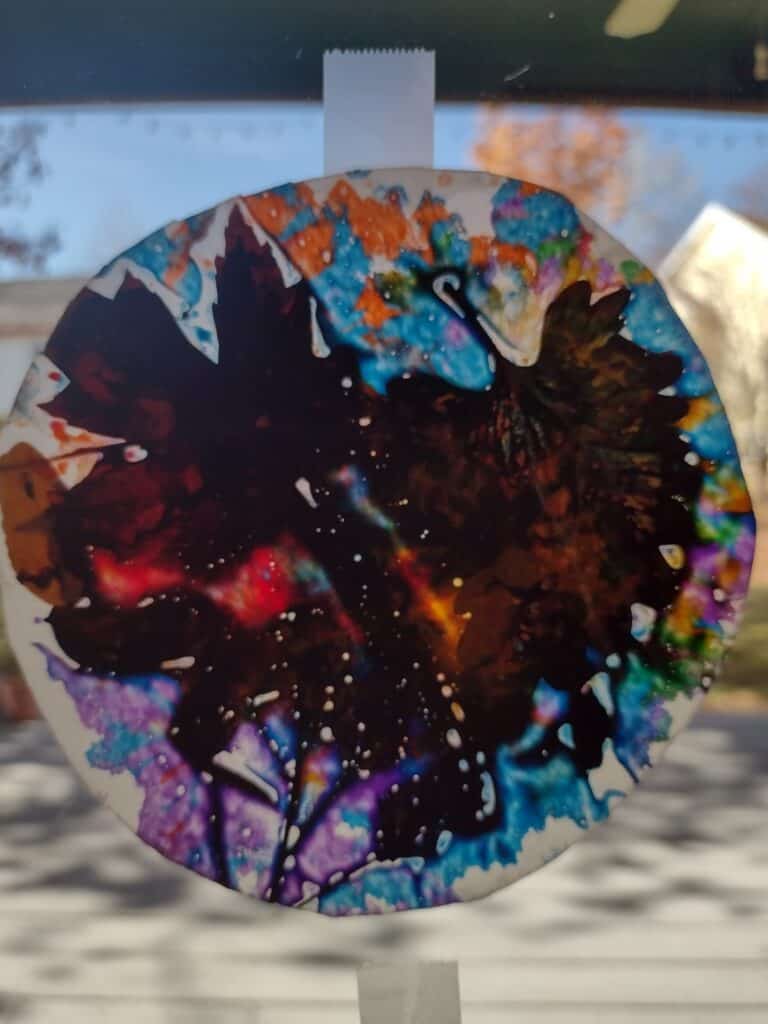
Last week we spent several days at my parent’s house. My baby was in high alert stranger danger mode and needed to be near me the whole time. This meant my 2 1/2 year old daughter had the grandparents mostly to herself. Besides feeding her Grumpy (yes that’s my dad’s grandpa name) imaginary food and shoes, singing happy birthday to everyone and everything in hopes of getting cake, and reading countless books, we also did a craft together. While my baby napped, Grammy and I made a suncatcher craft with her that we adapted from this craft video a subscriber sent to me.
My daughter has always loved crayons and whenever she has broken enough to need a new box, I have kept the old ones for crafting purposes. While I don’t want to encourage hoarding, keeping things like old crayons can be super helpful. Also, while talking about crayons, get your toddler ultra-clean ones. When I first saw them, I laughed at the ridiculous name. But after my daughter snuck a crayon into my pocket and turned an entire load of laundry purple, I am convinced that these are the best things ever. I washed everything again and it ALL came out.
How to Make a Suncatcher Craft With a Toddler
Materials:
- Flowers, leaves, etc.
- Flower press (optional)
- Crayons – use up old broken ones if possible
- Cheese Grater
- Wax paper
- Iron
Prep:
Before starting this craft, you need to dry and press your flowers and leaves. You can either use a flower press or follow these plant pressing instructions to use what you have around the house. This will be a several day process, but you could use fake leaves and flowers to get crafting right away.

The other prep can be done the same day as the actual craft. First, you need to shred some crayons. Using the medium holes on the cheese grater, I let my daughter help shred some of the longer crayons. I held her hand the whole time to make sure she didn’t didn’t accidentally shred herself.


Next, the wax paper needs cut. You can either cut two pieces or one big one that you fold in half. We folded one big piece that was about the size of a sheet of printer paper in half.

Creating:
Now it’s time to make something beautiful. To start, my daughter got to pick out the flowers and leaves she wanted. After picking them, she placed them on her wax paper. Then, she sprinkled the crayon she wanted on top. Grammy and I ran interference and made sure she only put things on one half of the wax paper. Unfortunately, we let her sprinkle on a bit too much crayon which made the flowers and leaves hard to see.


When she was all done placing flowers, leaves, and crayon shreds, we folded over the wax paper. Then, we let her make a few more. She was having so much fun, we decided we needed to make our own too.


Finishing:
To finish our off craft, we ironed it on medium heat. We put pieces of printer paper on both sides of the wax paper to make sure no crayon got on the iron. My daughter got to sit on a counter and watch from a safe distance. Then, I cut the wax paper into oval shapes to get rid of the outside area that had little or no flowers, leaves, or crayons on it.


Outcome of Suncatcher Craft:
Overall, I think that this suncatcher craft turned out really cool. A couple of them have a bit too much crayon, but besides that they are a great mix of nature and color. After we finished making them, we taped them up on my mom’s glass back door to let the sun shine through them. They match the fall season perfectly. If you enjoyed using a bit of nature in this craft, check out these nature monsters we made.


This looks so fun and cute! Can’t wait to try it out with my daughter 🙂
Thanks! Let me know how it goes