
Disclaimer: This page may contain affiliate links. As an Amazon Associate I earn from qualifying purchases. If you choose to make a purchase after clicking a link, I may receive a commission at no additional cost to you. Thank you for your support!
Are there any crafts from your childhood that you have been excited to share with your own kids? Two of the things that I have been waiting for my kids to be old enough for are Shrinky Dinks and Model Magic. I have already introduced them to Shrinky Dinks multiple times. This craft was the perfect opportunity to show my three year old daughter Model Magic. We have been making alphabet crafts using craft supplies starting with the same letter. Model Magic adds two M’s to our M is for monkey craft. Markers adds another.
How to Make an M is for Monkey Craft Using Supplies Starting With M
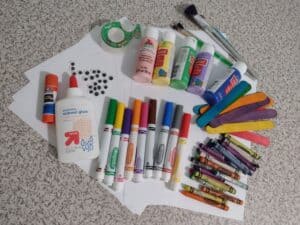
Materials:
Shaping the Model Magic:
To start, get out your Model Magic. Instead of using brown Model Magic, we used 1 oz of white to be able to color it with markers later. We started by making our M shape. To help with the shape, we made ours on top of an alphabet magnet. You could also freehand it, use an M shaped cookie cutter, or draw your own pattern. I had my daughter make the M shape by rolling out a long snake of Model Magic.

Then, I showed her how to lay it on the M to make the letter shape. We had some of it overhanging and she cut it off with her Playdoh scissors. She loved this part the best, so I made sure to save a tiny bit at the end for her to cut to her heart’s desire. I had her smash the M a little bit to give it a flatter shape.


Once she finished the M, we moved on to the monkey. We started by making all of the shapes. She made a large ball for the head, smashed two small balls for the ears, rolled out two arms, and rolled out one tail. While she made it, I had the picture of this M is for monkey pin up so she had an idea of what it was going to look like.


Then, we got to assembling. She rolled two little eyes and stuck them to the head. The ears went on next and then she put the whole head on the M. Next, she added the arms and the tail. After she put it all together, we had to wait for it to dry. The package says it dries to the touch overnight and fully dries in 72 hours. We waited a day before coloring.


Coloring the M is for Monkey Craft:
Next, I gave my daughter some markers. I explained that the monkey’s face was a lighter brown and the rest of it was a darker brown. She colored and colored. She really wanted to use another color, so I let her color the monkey’s face purple.


We must not have put all of the parts on very well, because most them fell off while my daughter colored. I used white glue to stick them back on after she finished coloring.

Conclusion of Our Model Magic and Markers M is for Monkey Craft
My daughter really liked playing with Model Magic and wants to do it again. She took the leftover piece I gave her and cut it, rolled it, and shaped it over and over again. She always loves coloring, and this was no different. It is hard to tell that it is a monkey, but the M is more obvious. Overall, it was pretty simple and fun. What crafty things did you play with as a child that you are excited to show your kids?
We are halfway through the alphabet, check out the rest of our letters. Subscribe at the very bottom of the page, so you get the second half delivered straight to your inbox in a weekly newsletter.

Is there something special about Model Magic or is it just a brand name.
It is just a name brand of air dry clay