
Disclaimer: This page may contain affiliate links. As an Amazon Associate I earn from qualifying purchases. If you choose to make a purchase after clicking a link, I may receive a commission at no additional cost to you. Thank you for your support!
What are you doing right now? Obviously you are at least considering making a DIY baby toy. But if I had to take a guess, you are doing something else as well. Are you watching a movie, eating a snack, hiding from your kids in the bathroom? As adults we often need multiple stimuli to keep us entertained.
One thing that surprised me when I had kids, was how they can entertain themselves with the simplest things. Both of my kids as newborns were happy just to stare at lights or if they were really lucky ceiling fans. Now as a toddler, my daughter will still get immersed in an activity as simple as gathering things and moving them back and forth between a Pringle can and a cloth bag. My 6 month old son loves anything that rattles, squeaks, or crinkles. He is completely amazed that he can create sound by moving these toys.
Even when we grow up and become multitasking machines, we still find ourselves drawn to fidgeting with the simplest of toys if they make noise. If you don’t believe me I can prove it with two words: bubble wrap. Since giving bubble wrap to a baby is not a good idea, I wanted to use fabric to make my son a crinkly toy he could safely make sound with. I decided to use my basic sewing skills and make him a fabric square that crinkles when he plays with it or more likely puts it straight in his mouth.
How to Sew a Cloth DIY Baby Toy
Supplies:
- 2 pieces of cardstock
- Scissors
- Paper cutter (optional)
- Pen
- Crinkle paper or a chip bag
- 2 pieces of fabric -check out 5 Ways to Get Fabric For Free or Cheap
- Thread
- Sewing machine – If you have one but you aren’t confident in your sewing, give this a try anyway as it is simple. I am in no way a sewing pro myself and am embarrassed to say that while making this I realized that I have been threading my machine wrong for years. If you are still hesitant about your sewing skills remember this is being made for a baby who will not care if you sew crooked or the two sides don’t quite line up.
Setup:
Before I got started sewing, I needed to make two patterns and gather my materials. I made my two highly sophisticated patterns out of cardstock. I wanted one to be 8 1/2″ x 8 1/2″ and the other to be 7 1/2″ x 7 1/2″. They can really be any size, but make sure the smaller one is approximately 1″ smaller on both sides. I used a paper cutter to very easily make my patterns straight but you can use scissors if you need to.

Now that you have your patterns, you need to gather your materials. I found a partially eaten chip bag to use to make the crinkly sound. I couldn’t quite justify eating the rest of the chips all right then, so I just cut off the top 3/4s of the bag. You can also skip the kitchen foraging and buy craft crinkly paper. Then I chose two different fabrics with bright and contrasting colors. One piece even had some fun texture.
Creating:
To start, I traced the smaller pattern onto the chip bag (yes I washed it first) and the larger pattern onto both pieces of fabric. Normally you want to use a fancy fabric pen, but by the time you finish this project you won’t be able to see any of the edges so use whatever you have on hand that will show up. Then I cut all three pieces out.


Next, I started pinning (get pinning tips here) to prep for sewing. I put the chip bag square in the middle of the non-pattern side of one piece of fabric, folded over each side as far as the crinkle paper let me, and pinned it.
Then I folded over two sides of the second piece of fabric and pinned them on approximately the same place as on the first piece. I then used the first piece to judge how far to fold over the remaining two sides. It took a few attempts but I eventually got the two halves to be the same size. Then I sewed around both fabric squares making sure to stay on the fold. I used white thread but you can use whatever color matches or looks fun with your fabric.


After removing all the pins, I put both halves together with the pattern side facing out on both sides. After another round of pinning I sewed around the edge again. This time I tried to sew as close to the edge as possible. Now you need to remove your pins (please triple check you got them all) and it is done. I did throw it in the washer after making it and it held up fine. I ran it on a cold cycle and air dried it.


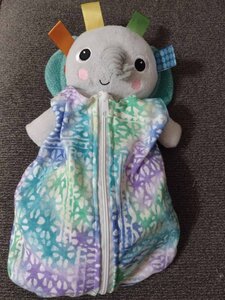
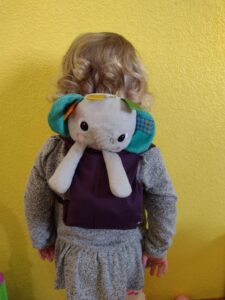
Outcome of DIY Baby Toy:
My baby loved his crinkly fabric square! The possibilities with these are endless. You can try different sizes, colors, or crinkly materials. I also think they would make really fun baby shower gifts. They may take some explaining for a new mom though. I know I would have been confused. I hope you and your baby enjoy them as much as we have. If you enjoyed making this, try out some of my other easy sewing projects.


This is genius. My kids always loved the crinkly things!
Thanks, it’s amazing how much they respond to sound.