Disclaimer: This page may contain affiliate links. As an Amazon Associate I earn from qualifying purchases. If you choose to make a purchase after clicking a link, I may receive a commission at no additional cost to you. Thank you for your support!
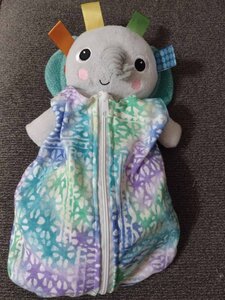
A year and a half ago, I got my kids a Toniebox for Christmas. Since then, we have collected quite a few small Tonie figurines. Before I made this felt DIY storage system, we kept them in a box. But, my kids liked to dump them all out to put other things in the box. Then, I tried metal tape on the side of my desk since Tonies are magnetic. This looked super fun, but the slightest bump sent them all tumbling to the ground. And you know what is really fun to a 4 and 2 year old? Knocking down a whole bunch of toys. That is when I decided to make them a DIY Tonies storage area.
My hanging storage keeps my kids’ Tonies off the floor and not rubbing against each other. It would also work great for other small toys. While taking pictures, I found that mine would also work for toy cars, Play-Doh, and Little People toys. I’m sure it fits many other toys as well and that is with my pockets the size they are. You can customize your pockets to be bigger or smaller to fit whichever toys you want to keep off the ground.
How to Make a DIY Toy Storage
Materials:
Step 1- Planning:
Before I cut any felt for the pockets, I planned everything out. First, I had my daughter reach as high up on the wall as she could and cut a large piece of felt to that height. I wanted to make it as big as I could, but I wanted at least one child to be able to reach all of the pockets.
Then, I figured out how big I needed to make each pocket. I decided that I would make two different sizes. Big pockets to fit some of the larger Tonies like Laurie Berkner dino. And small pockets that took up less space and fit the smaller Tonies like Elsa. To find out what size would actually fit them, I made little test pockets. I used straight pins to hold folded felt in place. Then, I adjusted the size until the toys fit. I was able to see exactly which Tonies fit in which size pocket so I knew how many I needed.


Once I had my test pockets the correct size, I cut a piece of cardstock to the same size to use as a pattern. Next, to double check, I cut out a pocket of each size and pinned them on my large piece of felt. Then, I placed toys in each one to make sure they fit before cutting a whole bunch.


Step 2- Making:
Now it was time to make my DIY toy storage system. First, I used my pattern to cut out a bunch of each size pocket. I used a variety of colors of felt and made sure that I made plenty of extras to fit future Tonies in.
Then, I laid out my large piece of felt and placed them all on it. I rearranged them until I was happy with the pattern. In the below picture you will notice there is a blank space. I miscounted how many pockets would fit, so I cut those out after figuring out where everything was going.

Lastly, I used straight pins to pin all the pockets in place and then sewed them all on. The sewing part was pretty tedious, but once I got the hang of it, it went much faster. I used a sewing machine, but I guess you could do it all by hand if you had the patience. Since all I did was sew three sides of rectangles over and over again, it didn’t take much sewing skill. Check out these basic sewing instructions if you are new to it. You could also potentially hot glue the edges if you want to avoid sewing. If you try this method let me know how it works in the comments.


Step 3- Hanging:
Now that you have a fully sewn DIY toy storage, it is time to hang it up. You may have a better way, but I simply reinforced two holes on top and hung my Tonies storage from Command Hooks. First, I cut a hole in the top two corners of my felt storage hanging. Then, I took a piece of cardstock and sewed it onto the back around the outside of the hole. Lastly, I cut out the hole from the paper.


Now I had a way to hang it from two Command Hooks. Make sure you choose Command Hooks that can handle a decent amount of weight. A single Tonie doesn’t weigh much, but a whole storage system of them does.


Conclusion of My DIY Toy Storage for Tonies
Making my DIY toy storage took a lot longer than I expected, but it works really well. Both of my kids can reach all of them to take them out. They can’t dump them all out, so the ones that aren’t being played with tend to stay in the organizer and off the floor. And sometimes they even go back in without me asking. I am very glad I made it for them and can definitely see myself making another one for other toys in the future. What types of toys do you want to make an organizer for?
If you are looking to organize other toys check out my other kid organization hacks. And if you have leftover felt from this project, learn other fun ways to use felt.
Also, if you are as big of a fan of Tonies as my family is, look into becoming a member of the Tonies Squad.