

Disclaimer: This page may contain affiliate links. As an Amazon Associate I earn from qualifying purchases. If you choose to make a purchase after clicking a link, I may receive a commission at no additional cost to you. Thank you for your support!
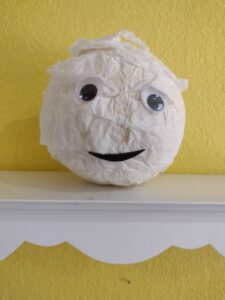
My 2 1/2 year old daughter came up with the idea of making a bubble wrap octopus craft. It sounds unrelated, but a couple of weeks ago we made tissue ghosts. My toddler had so much fun making them that as soon as we finished she asked for more. And then asked again, and again, and again. Instead of making more, we ate lunch. About halfway through eating, she stopped asking for ghosts and started asking for octopuses.
I looked at the ghosts and realized she was right, they did kind of look like octopuses. For the rest of lunch I looked at the tissue ghosts and planned how to turn them into octopuses. We happened to have some bubble wrap laying around, and I thought that would work great. We used a very similar technique to making the ghosts and I think that they turned out adorable! Also, did you know that bubble wrap was originally created as a 3d wallpaper?
How to Make a Bubble Wrap Octopus Craft
Materials:
- Bubble Wrap (small bubbles work best)
- Large paintbrush
- Acrylic paint
- Yarn
- Googly eyes (optional)
- Tape
- Glue
- Magnets (optional)
- Hot glue gun (optional)
Prep:
Before getting my daughter involved, I cut the bubble wrap. First, I traced a bowl onto the wrap to get a perfect circle. Then, I cut out my circle. I did this twice so I had two bubble wrap circles to try a few different things on. Next, you should read my tips on painting with a toddler to prep for painting. I wrote these tips and still decided to disregard them and not put my daughter in paint clothes. Big mistake!


Creating Our Octopus Craft:
Painting:
To start, I had my daughter choose what color paint she wanted to use. She chose to do the first octopus purple and the second one blue and purple. Next, I filled a small paper cup with the chosen paint and gave my daughter a large paintbrush. I had her paint the first one on the smooth side of the bubble wrap and the second one on the bubble side. I ended up liking the one painted on the smooth side better (the purple one).


My toddler painted for a long time. While she painted, I pointed out areas that still needed paint. Besides that it was all her. Once both bubble wrap circles were painted, we left them to dry.
Assembling:
Later that afternoon, we created our octopuses. This process was very similar to the tissue ghosts we had made earlier. First, I gave my daughter a sheet of paper that she crumbled. After placing it in the center, we tied yarn around it to make the head.


Then my toddler glued on googly eyes. Everything looks cuter with googly eyes.


Tentacle Making:
Next we needed to give the octopuses tentacles. At this point, I took over for the rest of the project. A slightly older kid that knows how to use scissors could continue helping. To make my tentacles evenly spaced, I placed 8 pieces of tape in a circle around the outside of the wrap. They don’t need to be exact. Then, I cut out an area between each piece of tape.


Now, It looked more like an octopus, but I rolled each strip up and glued it to make it look even better. At this point they were done, but I had no idea where to put this cute bubble wrap octopus craft in my house. I decided to hot glue some magnets on and add them to my fridge.

Conclusion:
I was super happy with how adorable these bubble wrap octopus crafts turned out. Enjoy making some yourself and let me know what you think.
Update: We enjoyed making these so much, we made bigger versions for my daughter’s three year old under the sea birthday party.

I love these. So cute! I wish more of our packages came with bubble wrap…lately we just get those huge air pockets. There are so many fun crafts to do with bubble wrap!
So true!
I’ve forwarded this article to both my besties as they have toddlers – sadly mine are 14 and 17; I miss the arts and crafts days
Thanks for passing it along! And thanks for passing along the reminder to enjoy the time I have being able to make things like this.
Awe! I love these! What an adorably fun idea and craft! They came out great!
Thanks! I am definitely happy with how they turned out
Bubble wrap octopuses and tissue ghosts? Oh my, your toddler has the mind of a genius! Such artistic and creative ideas.
She is way too smart for her own good. haha
Those are adorable! I can picture making different sizes and having a whole octopus family on the fridge.
I love that idea!