Disclaimer: This page may contain affiliate links. As an Amazon Associate I earn from qualifying purchases. If you choose to make a purchase after clicking a link, I may receive a commission at no additional cost to you. Thank you for your support!
Having my kids’ grandparents around is a huge blessing. But, as is the way of grandparents, they spoil their grandkids. My three year old daughter and her three year old cousin both love fighting fires. They will stock up on water (various toys) and push fire trucks to whatever is “on fire”. Then, they will spray the fire until it goes out. Well, grandpa had to step it up a notch and let them fight the fire in their electric fireplace. This inspired my jack in the box firefighter craft.
After getting to stay at the grandparent’s house for a few days, my daughter was pretty sad to return to normal life at home. We fought a few fires here and there. But, with our imaginary fires not being nearly as cool, my daughter moved on to other activities. I thought that it would be fun to make her some tissue paper fires that she could fight at home. I wanted something I could place anywhere and that my daughter could close once she put it out.
Using the concept of a jack in the box, I made my kids little pop up fires. They still aren’t nearly as cool as a fireplace, but we wouldn’t want to take away from the grandparent specialness anyway. Both my 3 year old daughter and 1 year old son play with their new firefighter craft.
How to Make a Firefighter Craft for Your Preschooler
Materials:
- Short Pringles can (grab n go size)
- Paint (optional)
- Red, orange, and yellow tissue paper
- Cardstock
- Tape
Prepping the Pringles Can:
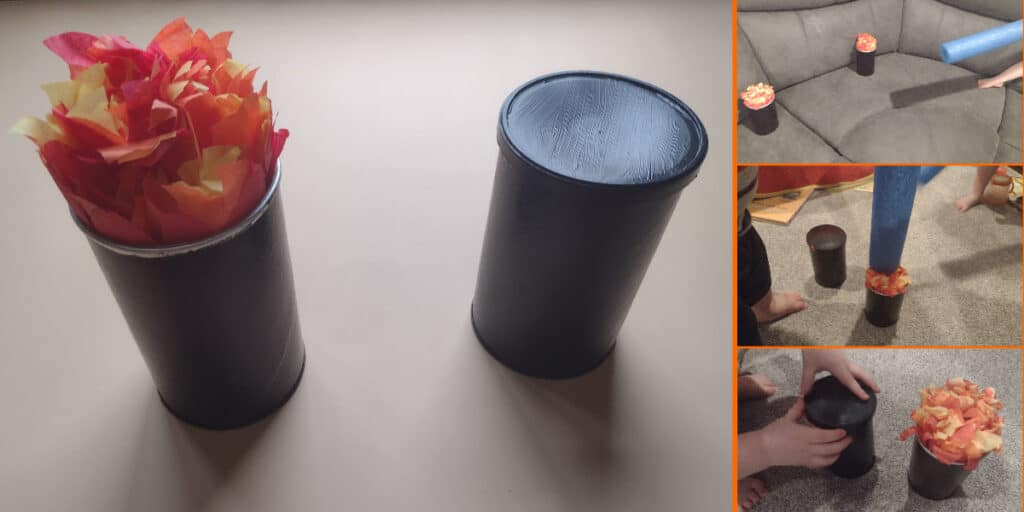
The first thing to do is get your Pringles can ready. This is the best part because it involves eating Pringles. I used the smaller Pringles can so the fire and springs didn’t need to be as tall. You can always put the chips aside in a plastic bag for later, but you can also just have a yummy snack with your kids. Once the can is empty, you need to wash it.
Then, you can paint it. I actually did this at the very end to make sure everything else worked first. Instead, I would suggest doing it first since it was a pain to hold when it was full. I painted mine black and did two coats so the printing on the can didn’t show through. I painted both the can and the lid so that the fire is completely hidden when my daughter closes the can.

Making the Tissue Paper Fire:
Now it’s time to make the fire. I did this very similarly to my torch decorations. First, I layered red, orange and yellow tissue paper. Then, I folded one corner up to the top and cut off the extra to make it into a square. Next, I folded it in half two more times and rounded the top to make it into an approximate circle.


While the tissue paper was still folded, I cut flames across the top. Then, I unfolded it and rotated the tissue paper around so my flame shapes didn’t match up. I grabbed the three pieces in the center and pulled it up to create a cone shape.


Next, I cut my tissue paper fire to approximately the height of my Pringles can. I realized after making both of my fires that I could have used the bottom half of my first fire for the second one instead of making a whole other one. Lastly, I put two pieces of tape in a cross shape on the bottom of the tissue paper fire. This was just to keep it all together.


Making the Paper Spring:
I remember making paper springs all the time when I was little. If you haven’t made them before, you need to start with two strips of cardstock. I used my paper cutter to cut them about 1/2 thick and the length of the long side of the paper. Next, you need to tape them together at a right angle.

Then, alternate folding one over the other until you run out of paper. Tape the ends together and you have a spring. I used three of these little paper springs for each fire jack in the box. I’m not sure if it helped or not, but I did stretch out my springs after making them.

Putting the Firefighter Craft All Together:
The only piece you are missing at this point is a circle platform for the fire to sit on. To make your platform, trace your Pringles can on a piece of cardstock. This is going to be too big, but it gives you an approximate size. Keep cutting your circle smaller and smaller until it easily fits inside your Pringles can. If you are making more than one fire jack in the box, you should use your first platform as a pattern for the rest. Then, tape your fire to the platform. I used four pieces of tape to hold it on good.

Next, you need to tape your springs to the bottom of the can. I put a piece of tape on the top and bottom of each spring. Then, I carefully lowered the spring into the can and used a pointy object (scissors) to press down the tape. I did this for all three springs. It took me a few tries to get them all where I wanted them.

Lastly, I put my fire platform in the can. Since the tape was already on the top of the springs, it was as easy as pressing the fire onto the springs. I pressed hard down on the whole thing to get the tape to stick. Now, I had a complete firefighter craft for my kids to play with.

Outcome of My Firefighter Craft Jack in the Box
I am so glad that I have two dedicated firefighters living in my house. As soon as a fire pops out of the can, both kids come running with their hoses (a blue pool noodle cut in half). They spray and spray until they put it out and my three year old daughter puts the lid back on the can. I am a little concerned about how many fires pop up around our house, but can feel safe with those two on the job.


Using tissue paper to make these is definitely a risk with two small kids. So far, we have just been extra careful to only let my one year old touch it with his pool noodle and not his hands. I’m sure we will eventually have a fire disaster and I will have to act fast to prevent tissue paper fire from spreading all over the house. But, the nice thing about this firefighter craft is, it would be easy to attach a new tissue paper flame to the platform and not have to redo the whole thing. And if it becomes too much of a problem I may remake them using plastic tablecloths instead.
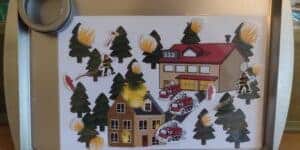
Overall, these have been a huge hit with my little firefighters. I would highly recommend making them to supplement your own kids’ imagination. And if your children like fighting fires as much as mine do, check out these other firefighter games from Kid Activities. What pretend games do your kids like to play?