Disclaimer: This page may contain affiliate links. As an Amazon Associate I earn from qualifying purchases. If you choose to make a purchase after clicking a link, I may receive a commission at no additional cost to you. Thank you for your support!
My three year old daughter is quite obsessed with her elephant lovey named Lumpy. I probably don’t help her obsession by making Lumpy things on a regular basis. My daughter has never been very interested in other stuffed animals until recently. But even now, the other stuffed animals are all things for Lumpy. One animal is Lumpy’s water bottle, one is her phone, one is her pet, and so on and so forth. My daughter also has a small blanket that is Lumpy’s dress, swim suit, pajamas, blanket, and whatever else she needs to wear. So, making doll clothes for Lumpy was sure to be a hit.
I always forget how bad I am at sewing, but I was still able to make a decent dress for my daughter’s special lovey. Well at least I thought I did, until I gave it to my daughter. Her first three guesses on what it was were pants, skirt, and backpack. So don’t worry if you aren’t great at sewing, making doll clothes for a stuffed animal is pretty simple. If you haven’t used a sewing machine before, here are some generic beginner sewing instructions.
How to Make Clothes for a Stuffed Animal
Materials for Making Doll Clothes:
- Fabric (check out these ways to get some free or cheap)
- Sewing machine (you could sew by hand instead)
- Scissors
- Sewing pins
Making the Pattern:
First, you need to make the pattern for your lovey’s clothes using your child’s lovey. I used a backup Lumpy while my daughter was napping. Fold the fabric you are using, so that you have two pieces and lay your child’s lovey down on it. Since Lumpy has no legs I figured that a dress would be the easiest thing to make her. So, I traced around her whole body leaving a wide gap. You will want to trace around whatever body part you are making the clothes for.

On my first attempt, I didn’t account for Lumpy’s head. I sewed it to the point I could try it on Lumpy and just laughed. There was no way it was going to fit over her big head. So before you start tracing, mark how big the head is. Then, add even more space to account for the hems.

Next, take the stuffed animal off your fabric and connect your lines. I wasn’t sure how I wanted to do the neckline, so I marked straight across to deal with it later. Once you have a full outline, cut it out with scissors. If you are planning on making more than one pair of clothes, trace your fabric on a piece of cardstock to use as a pattern later.


Sewing the Doll Clothes:
Now it’s time to use your sewing machine. The first things you want to sew are everything that you are connecting together. For me, this was the sides of the dress and the top of the sleeves. Make sure the non-pattern side is facing out on both pieces of fabric. Then, pin the sides together with sewing pins (get tips on pinning fabric here) and start sewing. I choose white thread to help you see where I was sewing better. Just kidding, I choose white thread because I was lazy and it was already in the sewing machine.


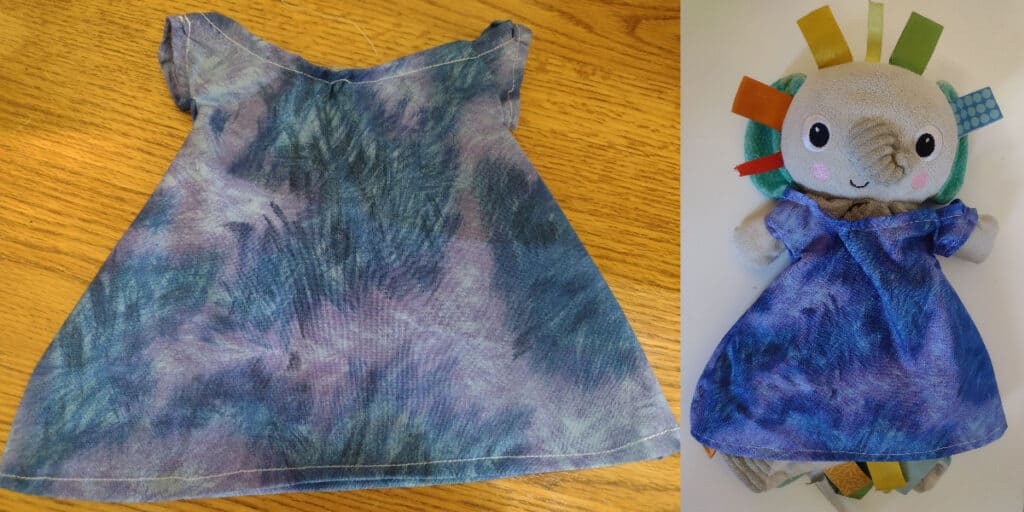
Once your sides are sewn together, flip the clothes right side out and try them on your child’s lovey. This is when I found out my first one was not going to work. If it looks good you can keep going. Since I left the neckline alone while making my initial pattern, this is when I fixed it. I cut a swoop and pinned down the hem while it was on Lumpy so I could see exactly how it looked. Then, I took it off and sewed it.


Lastly, I sewed the hem of the sleeves and the bottom of the dress. You need to hem all the edges of your fabric to prevent fraying. The bottom of the dress was easy to do, but the sleeves were a pain. Since they were so small, I constantly had to lift up the foot of the sewing machine to slide the next part of the fabric up. I had to be very careful to prevent the other side of the sleeve getting under the foot. After you finish sewing, it’s time to turn your clothes right side out.


Now your child’s lovey can try on their new clothes!

Outcome of Making Doll Clothes for My Daughter’s Lovey
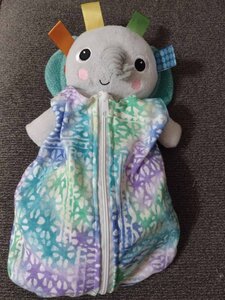
After I cleared up the initial confusion over what I had made, my daughter was very excited about Lumpy’s new dress. She left it on Lumpy for the rest of the day. I kept seeing my daughter giving Lumpy extra hugs the entire evening. At bedtime she changed her into the sleep sack I made her about a year ago. Unsurprisingly, it didn’t take long until my daughter starting asking for more clothes for Lumpy. I think I am going to try a non-sewing alternative to make her some more, so assuming it works, keep an eye out for that.
This dress definitely has some problems, mostly with the majorly gapping neckline. But, it is absolutely perfect for a little three year old girl’s lovey, so I am so glad I made it for her. Does your child’s lovey have an outfit of their own?
Make sure to check out my other simple sewing crafts and lovey-centered crafts like this fun backpack for your child to carry their lovey in.