
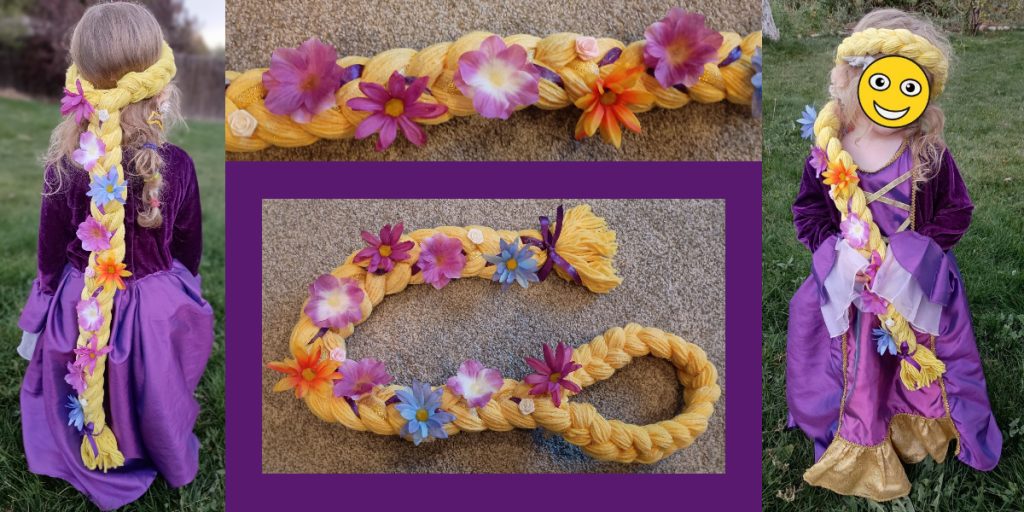
Flower gleam and glow, let your power shine, make my little girl have hair that reaches the ground. Ok, I had to do more work than singing to make this super cool Rapunzel hair, but it was still pretty easy.
My four year old daughter loves Rapunzel. We got my niece a Rapunzel dress for her birthday and my daughter thought it was so cool. She couldn’t stop talking about it. And then came the Tangled music, parts of the movie, and books from the library. So, of course for Halloween she really wants to be Rapunzel. I decided to go one step further and make the whole family Tangled themed costumes.
Making my daughter’s Rapunzel hair excited me the most, so I started with it.
Disclaimer: This page may contain affiliate links. As an Amazon Associate I earn from qualifying purchases. If you choose to make a purchase after clicking a link, I may receive a commission at no additional cost to you. Thank you for your support!
How to Make Rapunzel Hair for a Tangled Costume
Materials:
- 1 skein yellow yarn
- Ribbon (optional)
- Hair tie
- Hot glue
- Glow in the dark glue (optional)
- Fake flowers
Measuring for Making Your Rapunzel Braid:
First, you need to do some simple math and measurements. Measure your child’s head circumference and how long you want the braid to be. I wanted my daughter’s braid to not quite touch the ground to keep it clean trick or treating. So, I measured from the middle of her head to the ground. Plug these numbers in below:
- Child’s head circumference divided by 2
- Add length you want the braid to be
- Add some extra to account for length lost from braiding. Remember you can always cut it shorter after braiding, but can’t make it longer.
So, for my daughter:
- 20in / 2 =10in
- 10in + 35in = 45in
- 45in + 10in = 55in
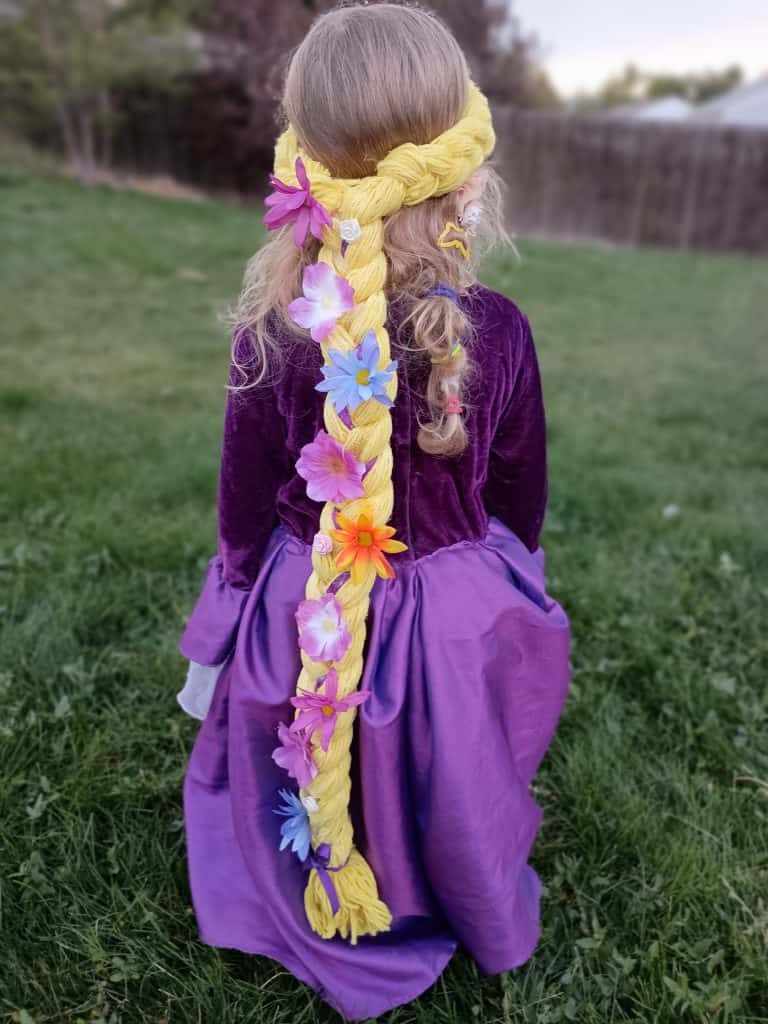
As you can see from the picture, the braid isn’t as close to the ground as I wanted. So, I would suggest adding a bit more to account for length lost from braiding.
Cutting Your Rapunzel Hair:
Now it is time to actually start. For the sake of keeping which end I am talking about straight, I am going to refer to the left and right from my viewpoint.
Place two chairs as far apart as the number you just calculated. Tie yellow yarn to the left chair and wrap it around the two chairs until you use up the entire skein.


Once you have it all wrapped, it’s time to mark a few things. Remember that 1/2 head measurement? Tie a piece of yarn a little more than that away from the right chair on both sides. I also tied more yarn all along both sides to keep it from tangling, but I immediately had to take it all off one side to be able to braid it. Then, cut the left side.


Braiding Your Rapunzel Hair:
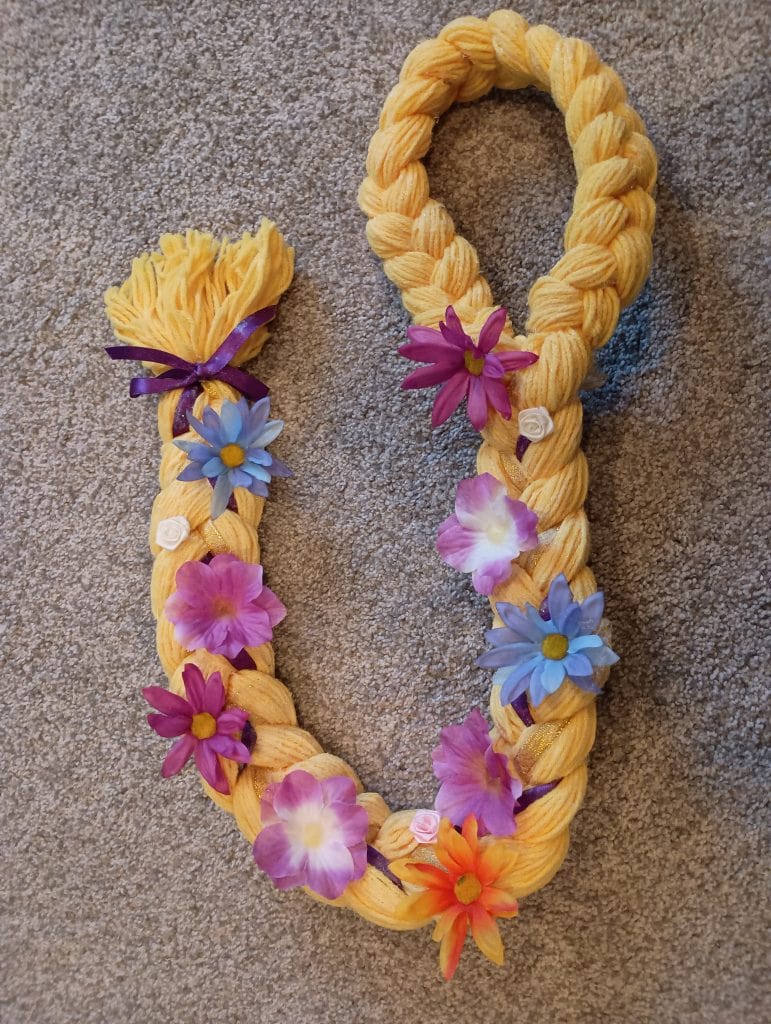
Carefully remove it from the chair and place it somewhere flat like a large table or the floor. Braid from the marked area in the middle until you have a braid long enough to wrap around your child’s head.

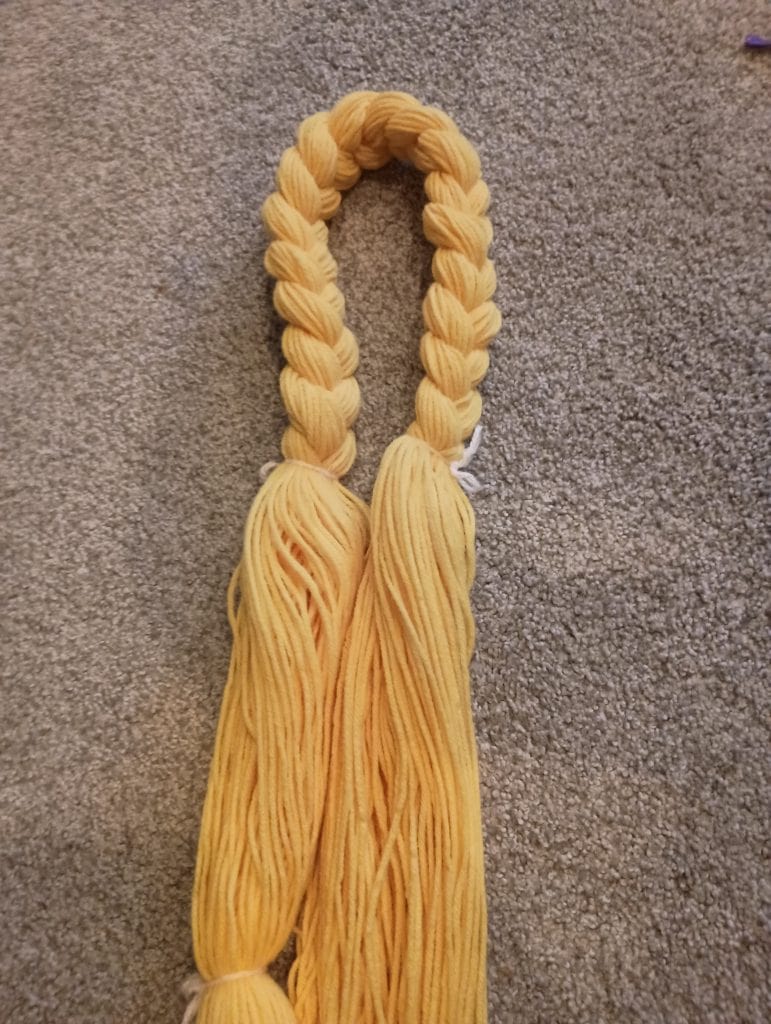
Next, gather all the yarn from both ends of your braid together and start braiding it. I found it easier to temporarily tie it together with other yarn to easily get the braid going. Stop as soon as you do the first cycle of braiding and temporarily tie it with string or a hair tie. This is the perfect time to test out the fit on your child’s head before you get any further. If it needs adjusted, you can just undo the tiny bit of braiding and adjust the little braid as needed.


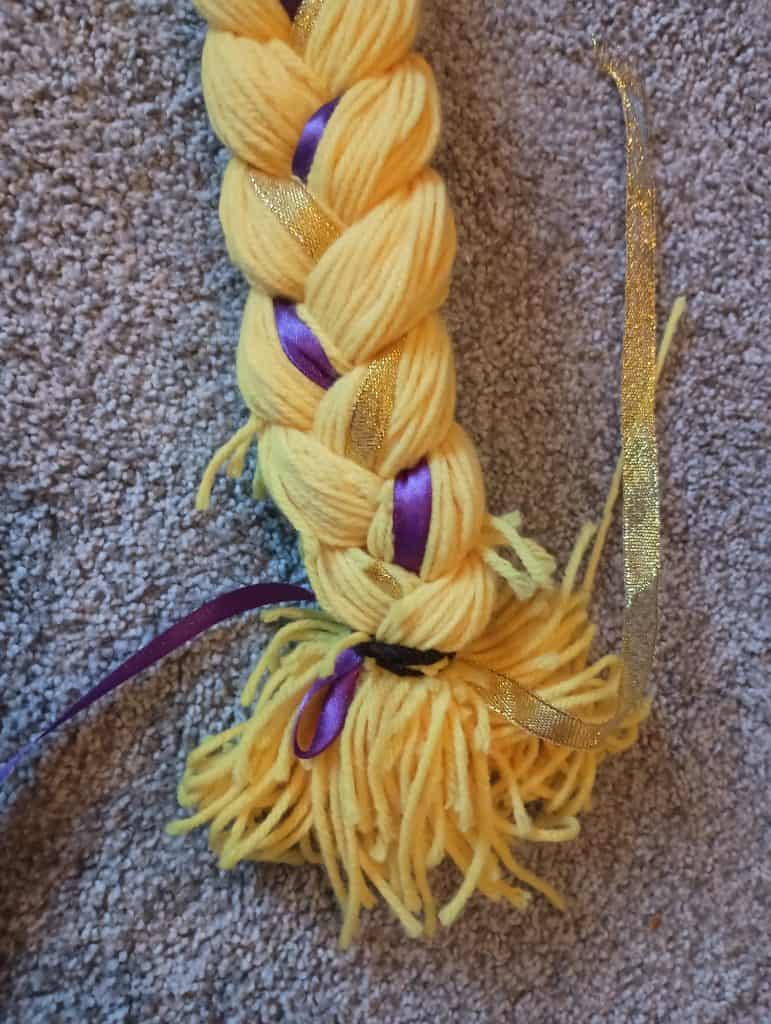
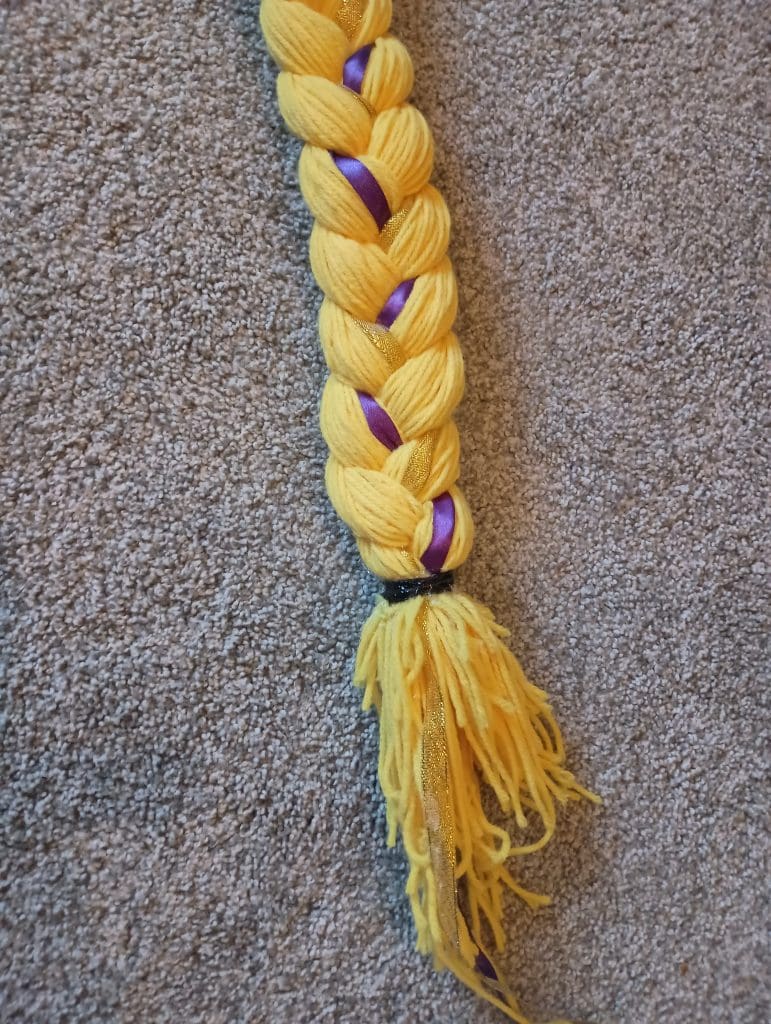
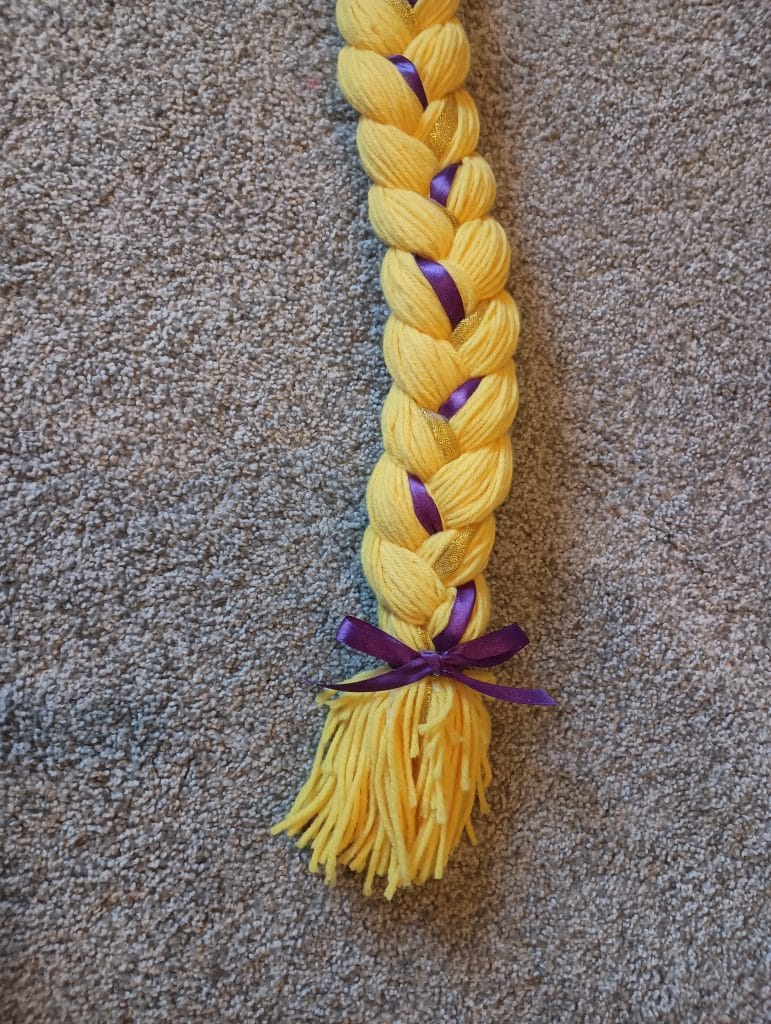
Once it is a good size, tie the tops of any ribbon you want in the plait to the top of the braid. I tied one purple ribbon and one shiny gold ribbon to different strands and left one strand plain. Now, you can finally just braid. Stop and smooth out the remaining yarn often to keep it untangled and tighter. Make sure to keep your ribbon on the top.


Once you get to the bottom, wrap a hair tie tightly around the end. There will be some yarn sticking out towards the bottom. Pull on those strands until they reach the next fold and use a hot glue gun to glue them in place. Then, hot glue the hair tie to the yarn to prevent any hair restyling by your kid. Tie a ribbon in a bow over the hair tie and hot glue it in place. Lastly, cut the end of so the majority of them are the same length. The end of the braid should look neater at this point.
Making the Hair Glow:
Making your Rapunzel hair glow is completely optional, but I think it adds a really special touch. Take glow in the dark glue and spread it all over the yarn except the inside of the head braid. It will make the yarn less soft and you can’t see that area so it is better to keep it soft against your child’s head. Your Rapunzel braid will glow some from just being in light throughout the day. But, if you want it to glow really bright, shine a UV flashlight all over it.
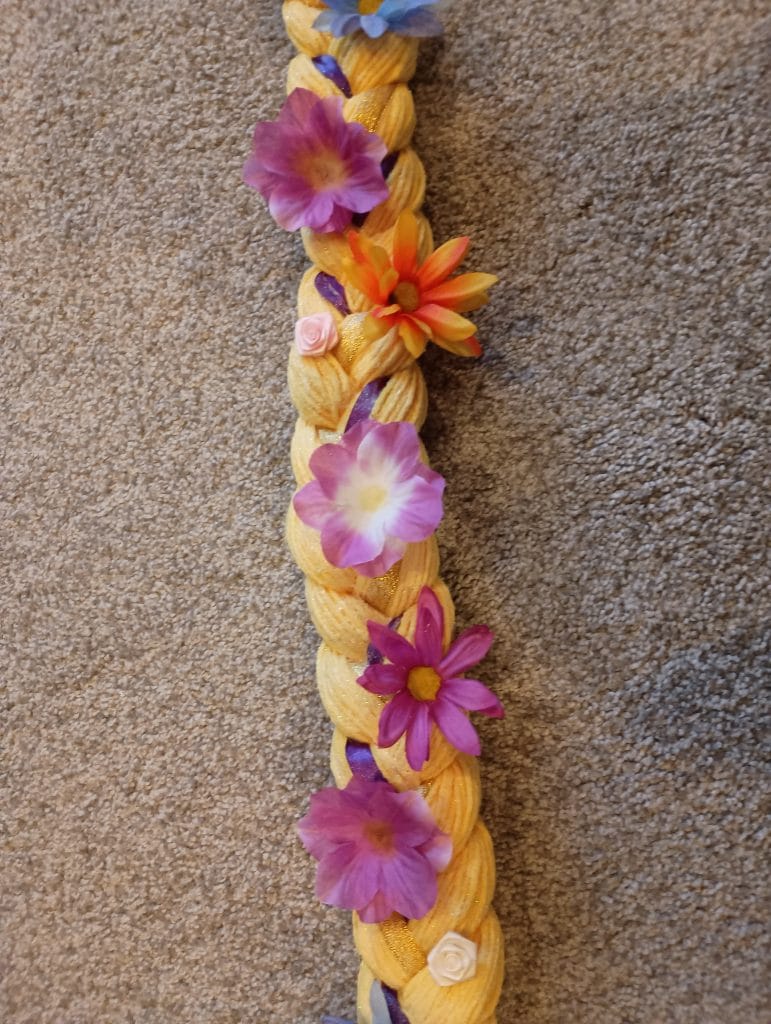
Decorating the Rapunzel Hair:
Last but not least, it is time to decorate the braid. I only used fake flowers, but you can also use rhinestones, pearls, or anything you think looks Rapunzel-esque. Place them on the braid and rearrange them until you are happy with how it looks. If there are any places on the braid that don’t look the way you want, cover them up with flowers. Then, when you know where you want everything, hot glue it all in place.
Conclusion of My Daughter’s Braided Rapunzel Hair
My 4 year old absolutely loves her Rapunzel hair! I am making her wait until Halloween to get to wear it and then it will be hers to play with whenever she wants. But, she tried it out after I finished making it and she was so happy with it. It was worth making just to have as a fun dress up play accessory, but it will be even more fun seeing her show it off while trick or treating. What does the little Rapunzel in your life think of their braid? Did you make it glow in the dark?
Check out the other costumes I have made including our other Tangled costumes from this year (coming soon). Need more ideas on using the rest of your glow in the dark glue? Check out these fun glow in the dark crafts.

She will be so cute.