Figuring out the cake design is one of my favorite parts of throwing my kids’ birthday parties. I have decorated very few cakes in my life. As in besides my kids’ birthday cakes I think I have decorated about 4. One of those was an elephant poop cake, so I’m not sure if it counts. Anyways, I enjoy figuring out a design that my kids love and that I can do. I also always make their cake in the shape of the age they’re turning. So, for my son’s trash truck party, I made him a three shaped garbage truck birthday cake.
I started by looking for inspiration on Pinterest. I quickly found two garbage truck birthday cakes that I liked. One was a cake with a toy trash truck on top. It had trash (crunched up candy) spilling out the back of the truck and down the side of the cake. The other cake was in the shape of a three. It had a trash truck toy driving on the top which looked like a road. I showed both pictures to my son and he liked both, so we combined them.
Coming up with a flavor of cake was a lot harder. My son isn’t a huge fan of cake, but he decided that an ice cream cake sounded good. But, for whatever reason, he didn’t want to pick an ice cream flavor. So, I came up with something that sounded good to me. Thankfully, he ended up liking it too.
This post is going to focus more on the cake design since it can be made with any kind of cake. But, the cake was so delicious that I will share the recipes I used for it as well.
How to Make a Garbage Truck Birthday Cake
Disclaimer: This page may contain affiliate links. As an Amazon Associate I earn from qualifying purchases. If you choose to make a purchase after clicking a link, I may receive a commission at no additional cost to you. Thank you for your support!
Materials:
- Cake ingredients
- Cake pan (I used this really cool number and letter pan)
- Parchment paper
- Frosting
- Food coloring
- Yellow sprinkles (optional)
- Icing spatula
- Piping bag
- Piping tips
- Trash truck (toy or paper)
- Candies (I used Reese’s, M&Ms, sprinkles, and Oreos)
Prepping the Design:
First, prepare your pan. Most ice cream cakes use springform pans to help you get them out once you finish making all your layers. But, I wanted my ice cream in the shape of the number 3. So, I set up my number and letter pan to make the number 3 and lined it with parchment paper. To help the parchment paper stick I buttered the pan so it had something to stick to.

Making the Garbage Truck Birthday Cake:
Then, it is time to make your cake. You can use whatever cake recipe you want. I made a fudge, Oreo, Reese’s ice cream cake. It was delicious so I am including how I made it below. But, if you are making a different kind of cake, skip the rest of this section and go to the “Frosting the Cake” section.
Layer 1 – Pretzel Crust
The first layer I made was a pretzel crust. I followed the crust directions in Fork in the Kitchen’s ice cream cake recipe. After I pressed the crust in, I put it in the freezer for 15 minutes to harden.

Layer 2 – Fudge
Next, I spread on a layer of fudge. I doubled Sally’s Baking Addiction’s hot fudge recipe and used 1 cup of it for this layer. Afterwards, it went back in the freezer for another 15 minutes. Once the rest of the fudge cooled completely, I put it in the fridge to use in later layers. I tried so hard to take more pictures as I made my cake this time, but I still forgot to take a picture of this layer.
Layer 3 – Ice Cream
Then, I spread on a layer of chocolate ice cream that had been sitting out for about 15 minutes. You can use any flavor you want. I used about 3/4s of a 1.5 quart tub of ice cream. At this point it needed to go in the freezer for at least 30 minutes. But, my kids were up from naps so I left it in the freezer until the following day.

Layer 4 – Oreo Fudge
Next, I followed Sally’s Baking Addiction’s ice cream cake recipe for the middle Oreo layer. For the hot fudge I used the hot fudge I made for layer 2. Then, I put it back in the freezer for 30 minutes.


Layer 5 – Ice Cream
Now, I made another layer of ice cream. This time, I cut up around a dozen Reese’s and stirred them into vanilla ice cream. Again I softened the ice cream beforehand and used about 3/4s of a 1.5 quart tub of ice cream. Then, I froze it for about 20 minutes.

Layer 6 – Fudge
Lastly, I spread on the last cup of the fudge I made for layer 2. At this point your cake needs to go into the freezer for several hours before frosting it. I waited a whole day.

Frosting the Cake:
Prepping Your Frosting
Before you frost your cake, you need to buy or make frosting. I made whipped cream frosting from Sally’s Baking Addiction’s ice cream cake recipe. To make sure I had enough, I doubled it.
Next, dye your frosting with food coloring. About 1/3 of it should be grey and 2/3 green. You can also make the tiniest amount of yellow or use yellow sprinkles. If you are using whipped cream frosting like me, make sure to stir your dye in carefully so you don’t knock the air out.
Prepping Your Cake
Once you have your frosting ready to go, it is time to get frosting. Start, by taking your cake out of the pan. This was nerve racking, but after I poked a spatula around all the sides, it came out easily. Then, cut small pieces off the corners to make it look more like a three.

Actually Frosting Your Cake
Next, take your grey frosting and spread it all over the top of your cake with an icing spatula. Then, take your green frosting and spread it over all the sides. Don’t worry if you don’t have a smooth edge between the grey and green since it will get covered up. At this point I would suggest putting it back in the freezer for 15 minutes. I did not do this and my cake started melting during the next step.


Once your cake is fully frozen again, fill a piping bag with the green frosting. I chose a random piping tip that looked like it would be fun. Then, pipe around the top edge of the cake covering up where the grey and green meet. I guess I also forgot to take a picture of the cake at this point.
Finally, use a small circular tip to pipe tiny dashes with your yellow frosting down the middle of the “road” on the top of your cake. Or you can make these dashes with yellow sprinkles. Sorry, no picture here either.
Place your cake in the freezer for 20 minutes to solidify your frosting. Then, wrap it well and store it in your freezer until the party.
Adding the Trash Truck Decorations:
Now that you have a cake that looks like a road, it is time to turn it into a garbage truck birthday cake. I waited to do these last steps until the day of the party. Before everyone arrives, cut up Reese’s and Oreos. Mix them with sprinkles and green M&Ms and put your mix somewhere handy. Then, about 20 minutes before you plan on eating the cake, take it out of the freezer to thaw. This is the perfect time to also finish the last of the decorations.
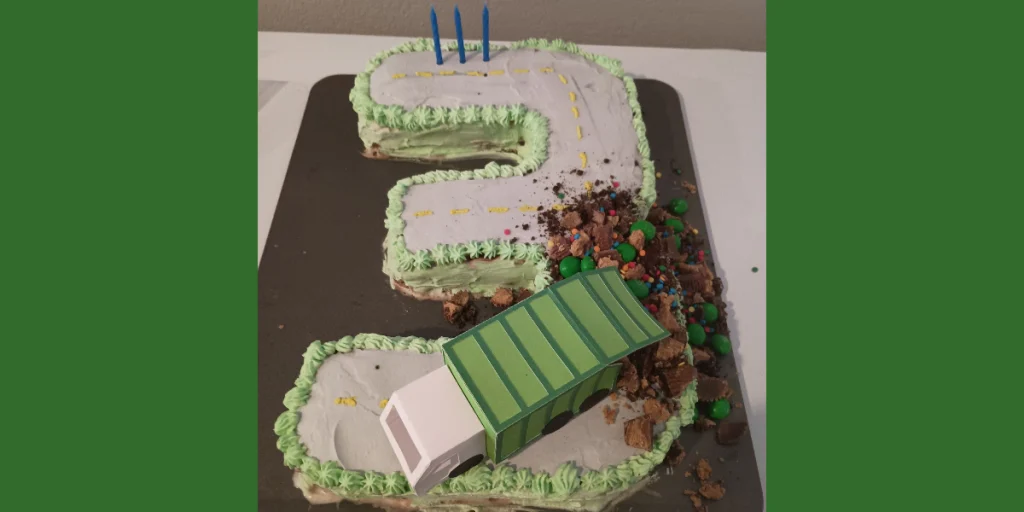
First, place your trash truck on the cake. I made a paper one (free SVG and directions here), but a toy trash truck would work just as well. Then, pour a little bit of your cut up candy in the back of the truck. Pour the rest of it from there onto the cake making it look like it is spilling out. Now you have a cool looking garbage truck birthday cake.
After finishing my decorations and starting to take pictures of the cake, I realized it looked a whole lot like an E for some reason. After thinking about it for a minute, I realized I had it upside down. Thankfully the design worked just as well flipped around since there was no way I was picking off all the “trash” and redoing it.


Lastly, put candles in the cake. I poked three holes in the top of the cake with a chopstick. This started the holes enough that I was able to poke candles in.

Conclusion of Our DIY Garbage Truck Birthday Cake
I really like how this garbage truck birthday cake turned out in both flavor and design. It was simple, I was able to make it over several days, and it tasted delicious. My son really liked the trash truck on top and he ate his whole piece. The guests thought the “trash” on top was funny and several asked for extra trash on their pieces. I will definitely make this (or a very similar) ice cream cake again. And the design is pretty flexible, so I wouldn’t be surprised if I make a variation of it again too. How well did your garbage truck birthday cake come out? Are there any changes you would make?
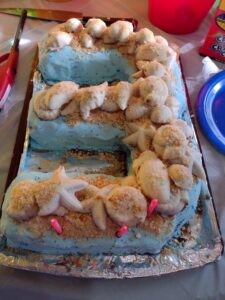
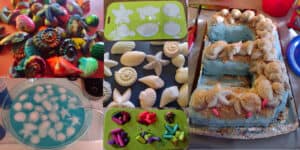
Don’t stop at this cake, check out my other fun trash truck party ideas. And take a look at the other fun cake designs I have made for my kids over the years.