Disclaimer: This page may contain affiliate links. As an Amazon Associate I earn from qualifying purchases. If you choose to make a purchase after clicking a link, I may receive a commission at no additional cost to you. Thank you for your support!
Making a birthday cake on your own can be a little daunting. You may think that it isn’t going to look anything like what you wanted or take way too much time. This castle cake that I made for my son’s first birthday party is a great starter cake. Since the main decoration is Hershey’s chocolate bar pieces, it is hard to get wrong.
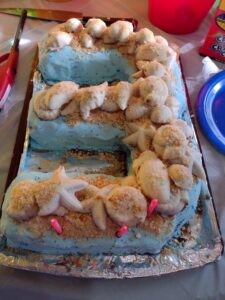
I made this cake for my son’s first birthday, so I made it in the shape of a number one. I also used an absolutely delicious homemade dark chocolate raspberry cake recipe that I found. Obviously, one or both of these might not be what you want to do. You can still follow along for the decoration instructions and use whatever shape and recipe (or box mix) you want. Since this was one of the last things I made for my son’s party, I was in a bit of a hurry and I forgot to take any pictures along the way, so I will be as descriptive as possible instead.
How to Make a Castle Cake Out of Hershey’s Chocolate Bars
Supplies:
- Cake pan
- Cake ingredients or box mix
- Frosting/ganache ingredients or frosting tub
- Hershey’s bars (around 8, depending on your cake shape)
- Oreos (I used the dark chocolate ones)
- Tray or pan (I used this cookie sheet)
Making the Cake:
As mentioned above, I followed a recipe to make a dark chocolate raspberry cake. It was SO good! It took some time, but it was completely worth it. I would highly recommend using it as well, but you can still make a really fun castle cake with any cake base.
I have a really fun cake pan that has little inserts that allow you to make whatever letter or number you want. Mine is from Pampered Chef, but this Amazon cake pan does the same thing. Since I only have one of these pans, I had to make my cake in batches. I poured half of my batter into the pan, baked it, removed the cake, washed my pan, and then poured in the second half. I did all of this the day before the party to cut down on stress. It also allowed the cakes to fully cool down in the refrigerator to make them easier to work with.
The next day, I cut both of my cakes in half to give me four layers. I had never done this before and it terrified me. It all worked out though. The recipe I used had me make a chocolate mascarpone cream and raspberry jam that I put between all the layers. Once, I had it all built up, it was time to start decorating. The recipe also had me make a chocolate ganache that I used as glue for a lot of the following decorating.
Decorating the Cake:
Now came the fun part! I placed my cake on a flat cookie sheet and started decorating.
To start, I made the four lookout towers. I used a quarter of my box of Oreos for each tower. At this point, all I did was dip each Oreo into the ganache and stack it. I then placed each tower where I wanted it along the cake. I started with the towers, so I didn’t have to decorate what they covered up on the cake. The below picture is from after I frosted them with ganache as one of the last steps.
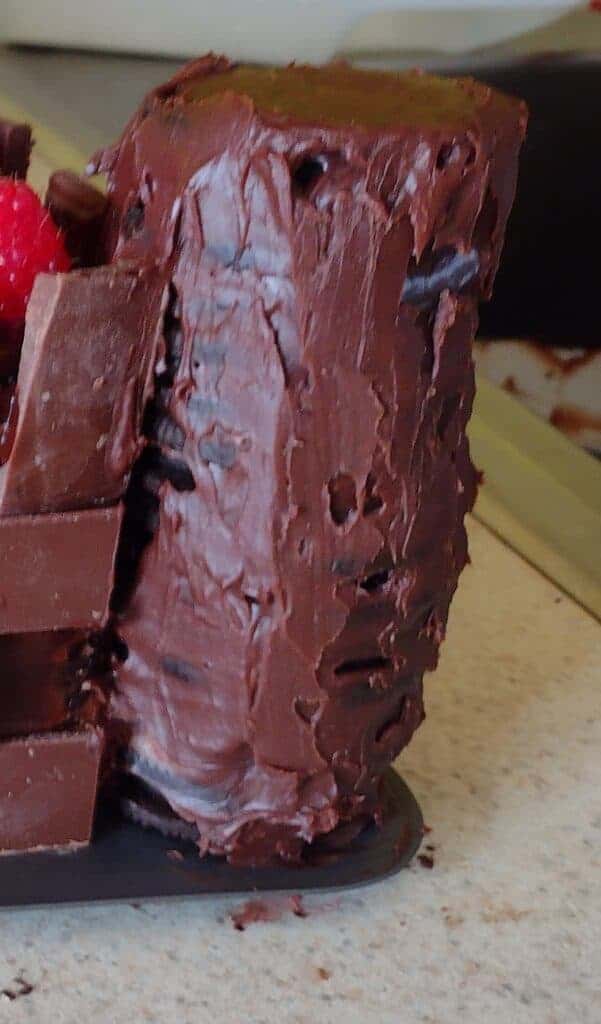
Then, I took my chocolate bars and broke them into rectangles. I used about 8 bars, but depending on how you space them and what shape your cake is, you might use more or less. Make sure you use the regular size bars and not the bigger ones. The bigger ones are harder to break along the lines and are unnecessarily thick.
I took each chocolate rectangle and dipped it in the ganache and stuck it to the side of my cake. I put them all smooth side out and offset each row by about half a rectangle width to make it look like a brick wall. When I got to corners and didn’t have enough space to place a whole rectangle, I broke one in half. After I finished the walls, I placed vertical rectangles all along the top to form the battlement.

Lastly, I used the rest of the ganache to frost the top of the cake and the Oreo towers. My recipe called for fresh raspberries on top, but you could leave it as is or add whatever else you wanted.

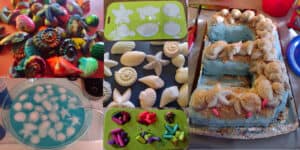
For extra fun, I placed some knight toys on and around the cake.

Conclusion of Making a Castle Cake:
I love how my number one shaped castle cake turned out for my son’s birthday party. I was worried that it was going to be a nightmare to cut, but it actually wasn’t. As I said before, it tasted so good and almost all of it was eaten up. It did take a while to make, but every step along the way was simple. Let me know in the comments what your favorite type of cake is. And check out some of my other fun knight and dragon party ideas like this giant fire breathing dragon.