Disclaimer: This page may contain affiliate links. As an Amazon Associate I earn from qualifying purchases. If you choose to make a purchase after clicking a link, I may receive a commission at no additional cost to you. Thank you for your support!
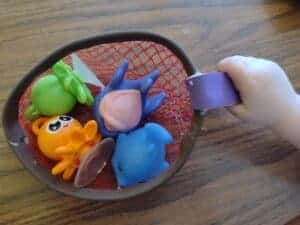
If you work in any project based industry you have probably heard the term “scope creep”. If not, it is when a customer keeps adding more and more to the initial request that you agreed to. My three year old had my husband and I cracking up with her extreme scope creep. She initially asked for a toy boat. Just a few minutes later it was up to a toy boat that looked a very specific way and could carry all her toys. I wish I remember all her additional DIY toy boat requirements to tell you.
While this toy boat doesn’t meet all of her requirements, both kids have still enjoyed enjoyed playing with it in the bath. And while it was very simple to make, there was a fun challenge I had to overcome. Making this foam boat would be a fun hands on lesson about buoyancy for an older kid.
How to Make a DIY Toy Boat for Your Kids
Materials:
- Foam sheets
- Hot glue
- Coins (I used pennies)
Designing the Toy Boat:
This boat was pretty simple to design. I loosely based my design off of this paper plate boat from First Palette. Here is the boat pattern that I made if you don’t want to make your own.
First, trace all your pieces onto your foam sheets. If you are using my pattern, cut out all the pieces from it and trace them onto your foam. If you are making your own, I would recommend experimenting with your pieces using paper first. Once you are confident, you can trace your paper pieces onto your foam sheets. I made all of my pieces out of brown foam except for the sail which I made my daughter’s favorite color: purple. Then, cut out all of your pieces.

Gluing the Toy Boat
Now it is time to hot glue it all together. I started with the mast and rolled my long piece of foam the best that I could. I glued it as I started rolling it and again once it was fully rolled. So that I could hold it down while the glue hardened, I did it in little sections. Be really careful while doing this to avoid burning yourself.


Once I finished rolling my mast, I glued the sail to the top of it.

Then, I started on the base of the boat. First, I glued the two short edges of the hull sides together. Then, I carefully pushed the hull base into the bottom of the hull and glued it in place. I glued a small section at a time, so I had the most control over its position.


Lastly, I glued the mast into the center of the hull. It wasn’t strong enough to stand up on its own, so I ended up gluing it to one side as well.
Fixing the Buoyancy of the Toy Boat
Now that the toy boat was all together, I went to test it out. I brought along several coins that I planned to tape to the bottom to correct how top heavy it was. I filled the sink, duct taped a coin on, and stuck my little boat in. It immediately fell over. I tried adding several more coins and it still immediately tipped over.
After trying several more ways of weighing down my boat, I came across this Scientific American article on boat keels. So, I got to work adding a keel. I cut two keel pieces out of my foam. Then, I glued them together on the short sides and glued the top to the center of my boat. This left the bottom open for me to place things in.


I experimented adding different weights in pennies to the inside of the keel. For my tests I just used duct tape to hold it shut. Once I was happy with how it was floating, I hot glued it shut. Let me know in the comments if you want to know how many pennies I ended up using. I don’t want to ruin the experimenting aspect for anyone doing this craft.

Conclusion of Making a DIY Toy Boat
First off, both my daughter and my 18 month old son love playing with this boat. My daughter doesn’t seem to mind that it doesn’t fit all of her requirements. I do make sure the kids aren’t too rough with it, but it is sturdy enough to hold up to their play. I really enjoyed designing and making this boat. Foam sheets and hot glue are two of my favorite craft supplies and I have used them to make bath toys before.
Second, I think this would be a great craft to teach an older kid about buoyancy. Help them make the base boat and then let them problem solve a way to prevent it from falling over. If you do this, please comment below what creative solutions they come up with. Or make the keel with them, but let them figure out the needed weight inside.