
Disclaimer: This page may contain affiliate links. As an Amazon Associate I earn from qualifying purchases. If you choose to make a purchase after clicking a link, I may receive a commission at no additional cost to you. Thank you for your support!
My three year old daughter is very interested in letters and what letters are in each word. She loves when my husband and I help her spell words with her magnets on the fridge. I made these colorful word mats to stick on the fridge as a simple alphabet activity for her. Now she can spell a handful of words whenever she wants to without our help.
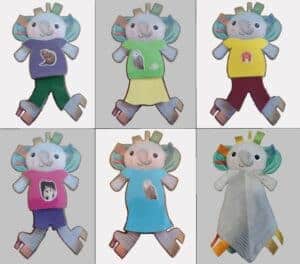
I do give some learning to read focused ideas below, but what I made for my daughter was for pure fun. It was not my intention to teach my daughter to read. I just wanted to help foster my daughter’s interest in letters. We have also been doing alphabet animal crafts for the same reason.
How to Make a Magnetic Letter Alphabet Activity
Materials:
- Colored cardstock, construction paper, etc.
- Alphabet magnets (plain, animal, DIY)
- Sharpie, pen, marker, etc.
- Laminator (optional)
- Magnetic tape
Prep for Magnetic Alphabet Activity:
Before you can get started making your alphabet activity, you need alphabet magnets. There is obviously a lot of variety. I based my word mats on these plain flat medium sized alphabet magnets from Walmart. I bought them specifically for this activity, but we already had these animal themed magnetic letters. They are a bit bigger and would have a been a pain to trace around. But, I made sure to space my letters out enough that they still fit if my daughter needs an extra letter. You could even make your own by printing letters out on printable magnetic sheets. Or go even further and make these super cute resin letters from The Handmade Home.

Once you have your letters, you need to choose what words you want to make. First, recognize your limitations. If you only have one set of letters, don’t pick any words that need multiples of a letter. Second, decide what you are trying to do. If you are actually trying to teach reading skills you could do sight words or CVC words. Here is a list of sight words from Parents and a list of CVC words from From Sounds to Spelling. You can also do words that you know will excite your child.
Since my daughter is purely exploring letters, I chose words that were fun for her. So, we went with both my kids names, Lumpy (the name of her elephant lovey), cat, dog, book, and toy. I wanted to do Mommy and Daddy, but couldn’t with only two sets of letters.
Making the Word Mats:
Now that you have your magnetic letters and your words, it is time to get started. Take out your cardstock or construction paper and the letters that it takes to spell your first word. Lay them out on the paper and trace around them with a pencil. I left a decent amount of space between each letter to give space for our bigger set of magnets. This also gave my daughter a little bit of room for error on placing her magnets. If you have any words that are too long for your piece of cardstock, just continue them on to the next piece.


Then, take off the magnets and go over your pencil line with a Sharpie, pen, or marker. I initially used Sharpie to do the initial tracing. It didn’t look as good since I bumped around a bit while tracing and it left a bit of black on the magnets. Next, cut out the word mat. I used a paper cutter to cut off the extra paper on top and to the side of my words.

Laminating the Word Mats:
If you have a laminator, it is now time to laminate your word mats. I use my laminator for so many projects. But, it is a crafting tool that you can normally use work arounds for. So, if you don’t have a laminator, you can either use packing tape or leave your word mats unprotected. Since ours go on our fridge (and therefore spend a lot of time on the ground in front of our fridge), I definitely wanted them to be water resistant. If you have any words on multiple pieces of cardstock, laminate them all separately.
Once you finish laminating, cut your word mats out again. Leave an edge around the entire outside to keep the lamination sealed. If you have words on multiple pieces, cut up to the paper’s edge on the sides that join. Then, tape them together. I am out of packing tape, so I used regular tape and it worked just fine.


Alphabet Activity Finishing Touches:
Lastly, attach magnets to the back of your word mats. I used magnetic tape which was so easy to put on the backs. One strip on each end holds them to the fridge without any problem.


Conclusion of Our Magnetic Word Alphabet Activity:
My daughter was super excited when she saw her new magnets and word mats on the fridge. She immediately started asking what the words were and putting magnets on each one. My one and half year old son immediately realized how fun it was to drag his arms down them to send them all crashing to the floor.
Since then my daughter’s interest has come and gone. There are still times that she really wants to play with them, but there are also days in a row they sit forgotten. The names I made are her favorites to do. I may make more every once in a while to keep them fresh. I think this activity would be perfect for things like sight words once she has fully started her reading journey. What words do you want to make your child?

You make learning so much fun.
Thanks, but I think a preschooler’s energy is what really makes it fun