Disclaimer: This page may contain affiliate links. As an Amazon Associate I earn from qualifying purchases. If you choose to make a purchase after clicking a link, I may receive a commission at no additional cost to you. Thank you for your support!
Stamps are such a fun art supply for kids. They let them make shapes and pictures that they can’t draw on their own yet. While any shape stamp is fun, shapes that are special to your kids are even more fun. I made a handmade stamp that looks like my 3 year old daughter’s elephant lovey named Lumpy. Then, I made my 1 1/2 year old son a cat stamp since he always gets excited when he sees pictures of cats. I also made them other simple shapes I knew they would enjoy including a smiley face, sun, heart, fish, and car.
How to Make a Handmade Stamp:
Materials:
- Foam sheets
- Pool noodle (or acrylic stamp blocks)
- Hot glue
- Stamp pad (here is what I used, this one has better reviews)
Making Your Stamp Design:
You will make the actual stamp design from foam sheets. To start, I drew some of my kid’s favorite shapes on a piece of foam. I used white to make it easier to tell when there was ink on it, but any color foam will work. I just freehanded my drawings, but you could also find fun images on Clip Safari to trace onto your foam.

Once you finish drawing, you need to cut out all of your pieces. You now have all the tops for your stamps.
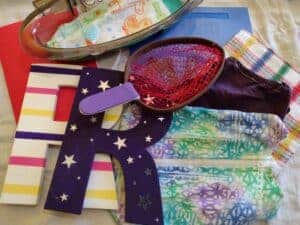
Making the DIY Stamp Back:
There are several ways to make backings for your stamps. Whatever you use needs to be somewhat rigid, easy for a kid to grip, and waterproof. I decided to use small pieces of a pool noodle. They worked pretty well, but it did make it hard to get the middle of the stamps to show up. I think there are some ways around this that I will discuss later. You could also use actual acrylic stamp blocks.
First, I cut small sections off of a pool noodle. I cut them around 3/4 inches wide. At first I cut them with an X-ACTO knife, but realized that using normal scissors was much easier. Then, if you want to make your stamps more rigid, you could glue a circle of foam onto the top to cover the hole. Or you could cut one of the sections of pool noodle into fourths and glue it into the middle of the noodle. I just left mine as is.
Make sure to check out other fun crafts that you can make with your leftover pool noodle.
Putting Your Handmade Stamp Together:
Now all you have to do is glue your pieces together. Take a hot glue gun and glue around your entire foam stamp design. If your design needs to face a specific way, make sure you think through how it will stamp before gluing it. Then, place your pool noodle (or other backing) on top and press down. That’s it! You have your very own handmade stamp for your kid to use.


Using Your Handmade Stamps:
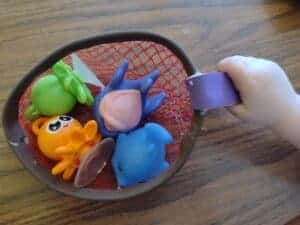
Time to test out your fun new stamps with your kids. I let both my three year old and 1 1/2 year old try them. I showed my older daughter how to press the stamps down with both hands onto the stamp pad and then the paper. We used a Melissa and Doug stamp pad, but surprisingly it didn’t work very well. These Ready 2 Learn stamp pads have better reviews. Or you can make your own stamp pad by following Paging Fun Mums’ instructions.


I also showed my younger son and he did a few by himself, but he wasn’t able to get much color to show up. So, I ended up getting the ink on the stamps for him and then he stamped it onto the paper. My daughter also started inking stamps for him. Once both of those got old, he started stacking the stamps.


Conclusion of Making a Handmade Stamp
Overall, my handmade stamps worked ok. It was really hard for the kids to get enough ink on them for the whole picture to show up. This was partially because of the hole in the pool noodle, but it was also because our stamp pad did not work well. While I normally love Melissa and Doug products, the ink on their stamp pad was very dry. I sprayed some water on it, but it still didn’t work well. I tested the stamp pad on a stamp I use on a regular basis, so I know it wasn’t just my handmade stamps.
All that to say, I think with some of the above suggestions and a better stamp pad, these stamps would work really well.


The quality of the stamps didn’t really matter to my kids. They both had a blast making colorful shapes on their papers. My daughter especially loved the Lumpy head stamp. She figured out pretty quickly that she could put the stamps where they touched multiple colors on the stamp pad. She really enjoyed the resulting rainbow stamps. What shape stamps did you make?