
Disclaimer: This page may contain affiliate links. As an Amazon Associate I earn from qualifying purchases. If you choose to make a purchase after clicking a link, I may receive a commission at no additional cost to you. Thank you for your support!
I have heard a lot of great things about dot markers. My three year old daughter has used them in Bible class and thinks they are a lot of fun. I kept meaning to get some, but never got around to it. So, when I was looking for something crafty starting with D for my latest alphabet craft, dot markers quickly came to mind. I decided to make them instead of buying them. Besides a bit of initial experimenting, my DIY dot markers were really fast and easy to make. And since I made them myself I got to choose which colors to make.
How to Make Your Own Dot Markers
Materials:
- Plastic travel bottles
- Sponge eraser sheet
- Tempera paint (I used yellow, red, and blue)
- Hot glue
Prep for DIY Dot Markers:
I quickly found that plastic travel bottles work really well as the base for DIY dot markers. Figuring out how to make the tips for these markers was a lot harder. I wanted something that would hold up and wouldn’t prevent me from refilling the markers. I found that gluing little sponge eraser sheet circles inside the bottle worked the best. While this doesn’t fully fit these two requirements, it is really close. I will talk more about how I used them later, but for now I just want to show you how to make the circles as prep for making your dot markers.
I cut out all six circles that I needed while my bottles were still empty. Instead of tracing around the top, I just pressed down really hard with the bottle and rocked it back and forth. This cut through the sponge and gave me the exact size of foam circle I needed.


Making the Paint:
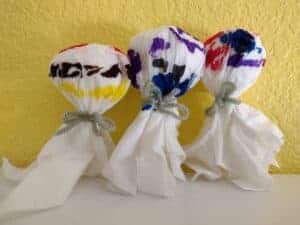
The next thing I experimented with was making the marker paint. 1/2 water to 1/2 tempera paint worked the best. I tried 1/4 paint to 3/4 water for the red and you can tell in the final picture that it was really runny. I only had yellow, red, and blue tempera paint leftover from making chalk. So, I made three of my dot markers those colors and mixed them together to make purple, orange, and green markers as well.

I did all my mixing of paints and water in the bottles. Once I filled them with paint and water, I shook them until they were well mixed.

Making the DIY Dot Markers:
Now that you have the sponge top circles and the paint in bottles, it is time to put it all together. I used hot glue to glue the sponge to the top of the bottle. First, I glued around the entire inside rim of the bottle. Then, I quickly placed the eraser sheet circle inside. I made sure it extended above the side a little bit and was as flat as possible.


Now the dot markers were ready to use. The first time I used them, I had to squeeze a bit extra get the paint to cover the sponge.


Refilling the Dot Markers:
Above I said that one of my concerns was being able to refill my markers. Since I glued in the sponge tips, I can’t exactly just refill them. But, I did test cutting out the sponge with an X-ACTO knife and replacing it. It was super easy and quick. The amount of the eraser sheet I initially used was so small I could either put in a new tip or wash out the old one and glue it back on. The lids seal the bottles enough that I haven’t had any problems with my markers drying out.
Conclusion of DIY Dot Markers:
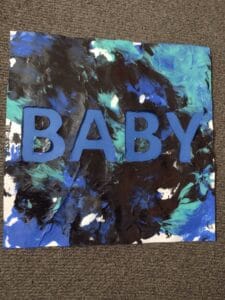
These were a hit! My daughter saw them sitting on top of my desk and immediately started asking to use them. We used them for our D alphabet craft (coming soon) and she asked for more paper at the end so she could keep dotting. I also had my one and a half year old try them out under close supervision. He doesn’t like sitting still, but he still enjoyed using them. Letting him out of his chair to run around upset him since he wanted to keep playing with them.
I had a lot of fun testing them out and could have kept dotting for a long time. When I showed them to my husband, he got a kick out of them as well. Overall, a huge success. They show no signs of wear and tear, so I think they will hold up well.

Can’t imagine what you will come up with next.
Something fun, I hope