The crafts I do with the kids keep making our bedtime routine more complicated. Every night we had the same routine with our kids before bed. We read, prayed, and sung. But then I made the kids glow in the dark shapes for the ceiling. So, we added shining the shapes with a UV flashlight to the routine. And now my 4 year old daughter also wants to glow her new paper bead bracelet. So, after glowing the ceiling, we glow her bracelet and she puts it on her desk where she can see it all night long. She had so much fun making the paper beads and absolutely loves it.
These paper beads were so easy to make. After some practice, my four year old daughter was able to make them herself. Keep reading to learn how to make them yourself or with your own kids.
Disclaimer: This page may contain affiliate links. As an Amazon Associate I earn from qualifying purchases. If you choose to make a purchase after clicking a link, I may receive a commission at no additional cost to you. Thank you for your support!
How to Make a Paper Bead Bracelet
Materials:
- Paper (cardstock, tie dye paper, etc)
- Glue stick
- Toothpick (or other thin round object)
- School glue
- Parchment paper (or something similar)
- Glow in the dark glue (optional)
- Bracelet cord
Making the Paper Beads:
To start, cut your paper in long thin triangles. They don’t need to be perfect. We used cardstock and I gave out tie dye paper for other people to try. But any paper works.


Then rub a glue stick all over the side you want showing. This step isn’t strictly necessary, but I found it helpful. Next, wrap the paper around a thin round object like a toothpick. Start with the wide end and finish with the point. I cut the pointy ends off the toothpick my daughter used.


Lastly, carefully slide the paper bead off the toothpick and cover it in school glue. Place it on a piece of parchment paper or something similar to dry.


Making Glow in the Dark Paper Beads:
If you want to make your paper beads glow in the dark, you have one extra step. Spread glow in the dark glue all over the beads. If you don’t want to make them glow in the dark, you should still cover the beads in another layer of glue. This extra layer makes them a bit stronger. If you do use the glow in the dark glue, the beads will glow from being exposed to the sun. But, if you want a faster way to make them glow really bright, shine a UV flashlight on them.
Making the Bracelet:
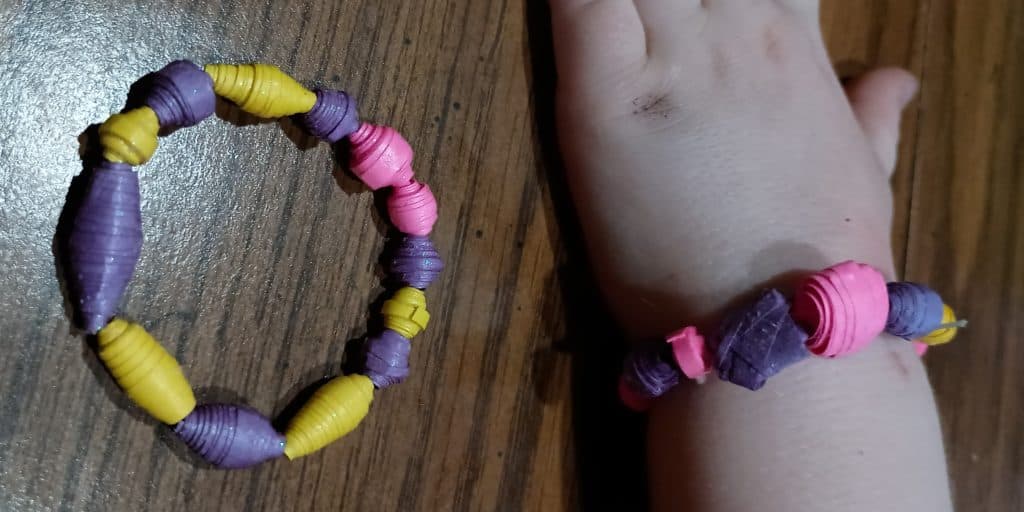
Lastly, use the paper beads you made to make a bracelet. Once they are dry, string them on a piece of bracelet cord and tie it together with a couple knots. I temporarily tied the cord around the first bead so my daughter could string on her beads without worrying about them falling off. Then, tuck the ends of your cord through the beads next to it to hide it.


Conclusion of Making Paper Bead Bracelets
This is definitely a craft we will be making again. We did it over two days. The first day my daughter tried a little, but mostly watched. The second day she had more confidence and wrapped and glued them all by herself. They weren’t tight and were a little crazy, but they were hers. It was so fun to see her progress. And really my beads got better and better as we went as well. So, overall, they were a hit. We gave one away to a friend and she kept the other. Let me know in the comments how much your child (or you) enjoyed making them.
If you found this post from receiving one of my colorful instruction pages please let me know in the comments. I am always curious what the impact of doing things like that is.
If your child enjoyed this craft, I bet they would also enjoy making Shrinky Dink keychains. And if the glow in the dark glue was a hit, check out the rest of our glow in the dark crafts.